Introduction: Can You Replace a Window Without Removing the Siding?
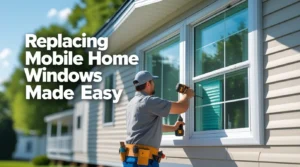
Replacing windows in your home can seem like a daunting task, especially when dealing with existing siding. Many homeowners wonder: “Do you have to remove siding to replace windows?” The good news is that it is possible to replace a window without removing the siding—if done correctly.
This guide will walk you through the step-by-step process of replacing a window while keeping your siding intact, helping you save time, labor costs, and unnecessary exterior repairs.
Do You Have to Remove Siding to Replace Windows?
Not always! The answer depends on the type of window and the installation method.
- If you’re installing replacement windows, which fit into an existing frame, you can usually avoid removing siding.
- If you’re installing new construction windows as replacement, some adjustments may be required, but it is possible with the right techniques.
By following the correct process, you can remove and replace your old windows while keeping the window replacement siding undisturbed.
Tools & Materials Needed for Replacing Windows Without Removing Siding
Before getting started, gather the necessary tools and materials:
Tools:
- Pry bar
- Utility knife
- Measuring tape
- Caulk gun
- Drill and screws
- Hammer
- Level
- Putty knife
Materials:
- New replacement window
- Window flashing tape
- Exterior-grade caulk
- Foam insulation
- Shims
- Window trim (if necessary)
Having these tools and materials ready will make the process smoother and ensure a secure installation.
Step-By-Step Guide: How to Replace a Window Without Removing the Siding
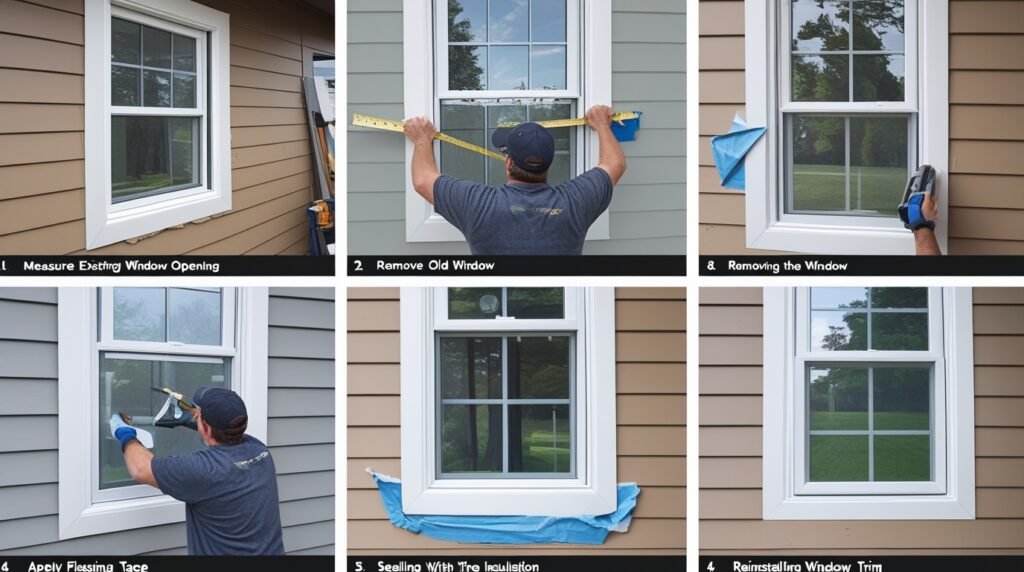
Follow these steps carefully to replace a window while keeping your siding intact:
Step 1: Measure Your Existing Window Opening
- Before purchasing a replacement window, measure the width, height, and depth of your current window frame.
- Ensure the new window is the correct size to fit the existing frame.
Step 2: Remove the Old Window
- Use a utility knife to cut away old caulk and paint around the window frame.
- Carefully remove any screws or nails securing the window.
- Use a pry bar to gently remove the old window from the opening.
Step 3: Inspect & Prepare the Window Opening
- Check for rot, water damage, or cracks in the frame.
- If necessary, replace any damaged wood before proceeding.
- Clean the opening thoroughly.
Step 4: Apply Flashing Tape for a Waterproof Seal
- Add window flashing tape around the edges of the window opening.
- This step is crucial for preventing water leaks and ensuring a weatherproof seal.
Step 5: Position & Secure the New Window
- Place the new window into the opening, ensuring it sits level and square.
- Insert shims to keep it steady while securing it in place.
- Drive screws into the frame to fasten the window.
Step 6: Seal Around the Window with Caulk & Insulation
- Apply foam insulation between the window frame and the house to prevent air leaks.
- Use exterior-grade caulk around the edges to create a watertight seal.
Step 7: Reinstall Window Trim (If Necessary)
- If the trim was removed during the process, reinstall it carefully.
- Ensure a snug fit and use nails or adhesive to secure it.
Using New Construction Windows as Replacement Without Siding Removal
If you have new construction windows, they usually come with a nailing flange, which is typically secured behind the siding. However, with a few modifications, you can install them without taking off siding by:
Cutting off the nailing flange (only if necessary).
Securing the window with screws through the existing frame.
Applying additional flashing tape for waterproofing.
This method allows you to use new construction windows as replacements while keeping your siding intact.
Reinstalling Window Trim & Sealing Gaps for Energy Efficiency
A critical step in window replacement is properly reinstalling trim and sealing gaps to maintain energy efficiency.
Ensure the trim sits flush against the window frame.
Use weatherproof caulk to seal gaps and prevent air infiltration.
Check for any drafts and add insulation where needed.
Proper sealing improves energy efficiency, reduces drafts, and prevents moisture damage.
Vinyl Siding Around Windows Installation: Ensuring a Seamless Look
If you’re working with vinyl siding around windows, be extra careful to maintain the integrity of the panels:
Use a zip tool to slightly loosen siding around the window edges.
Work gently to prevent cracking or warping.
After installation, snap the vinyl back into place and ensure a tight seal.
By handling vinyl siding carefully, you can achieve a seamless, professional finish without the need for siding removal.
Common Mistakes to Avoid When Replacing Windows Without Removing Siding
Even experienced DIYers can make mistakes. Avoid these common pitfalls:
Incorrect Measurements
Always double-check window dimensions before purchasing.
Skipping Flashing Tape
Waterproofing is essential to prevent leaks.
Over-Tightening Screws
This can warp the window frame and affect its operation.
Poor Insulation
Gaps can lead to energy loss and drafts.
Not Sealing Properly
Without proper caulking, water damage can occur over time.
By following best practices, you can ensure a successful and long-lasting window replacement.
Cost Considerations & Professional vs. DIY Window Replacement
DIY Window Replacement Cost
Replacement Window: $200 – $800 per window
Insulation & Caulk: $20 – $50
Tools (if not already owned): $50 – $150
Total Estimated Cost: $270 – $1,000 per window
Hiring a Professional
Hiring a contractor typically costs $500 – $1,500 per window, depending on complexity.
Professional installation ensures perfect sealing and insulation, reducing the risk of leaks.
For experienced DIYers, replacing a window yourself can save money. However, hiring a pro may be the best choice if you want a hassle-free installation.
Final Thoughts: Is It Worth Replacing Windows Without Removing Siding?
Yes! Replacing a window without removing the siding is entirely possible if done correctly. By following proper techniques, you can:
Save money on labor costs
Avoid unnecessary siding damage
Ensure a weatherproof and energy-efficient window installation
If you’re comfortable with DIY projects, this process can be a cost-effective and rewarding upgrade. However, if you’re unsure, consulting a professional can save time and prevent costly mistakes.
Need professional window replacement services? Contact us today for expert assistance!